Pages

Tampilkan postingan dengan label of. Tampilkan semua postingan

Senin, 28 Oktober 2013

Meatless Meatballs! Celebrating the Magical Meatiness of Mushrooms on Earth Day

I’ve wanted to turn our famous veggie burger recipe into a meatless meatballs recipe for a long time now, and figured there would be no more appropriate occasion than Earth Day to reveal the results. After all, as I joke about in the clip, eating mushrooms is about as close to literally consuming the earth as you can get.

Despite being completely free of meat, at least the animal kind, these “meatballs” were fantastic. Thanks to a thorough browning, the mushrooms provided more than enough savoriness, and the garlic, cheese, and parsley did the rest. As impressive as I thought the taste was, what really blew me away was how close the texture was to actual meatballs.

For me, the true test of any alternative meatless recipe is whether I would eat it again, based on taste and texture alone, and not just because it’s meatless. In this case, I would…many times over. No, I’m not giving up real meatballs, but for a delicious and vegetarian-friendly change of pace, these really were tremendous.

So, whether youre going to make these because you’re a vegetarian who has been searching for a meatless version, or you’re a hard-core meat eater who just can’t believe your ears and eyes, I hope you give these a try soon. Have a happy Earth Day, and as always, enjoy!


Ingredients for 16 small meatballs:
(recipe can easily be doubled!)
1 pound white mushrooms, chopped into very small pieces
2 tbsp olive oil
pinch of salt to sauté mushrooms
1 tbsp butter
1/2 cup minced onions
4 minced garlic cloves
1/2 cup instant oatmeal
1/2 cup breadcrumbs
packed 1/4 cup chopped Italian parsley
1 ounce by weight, Parmigiano-Reggiano cheese, very finely grated on a microplane
(Note: it looks like a ton of cheese in the video, but it was only 1-oz. Because I used a microplane to grate it, it created a huge looking pile of cheese. It would be about 1/2 cup if you measure, but use weight for this ingredient!)
1 tsp salt
freshly ground black pepper and cayenne to taste
pinch of dried oregano
2 eggs
3 cups of your favorite pasta sauce.
*Let mixture sit overnight in fridge. Bake meatballs for 12-15 at 450 degrees F., then simmer in sauce for 30-60 minutes before serving.

View the complete recipe

Read More..

Jumat, 25 Oktober 2013

Cream of Chicken 奶油鸡汤


I was hungry one night and decided to make myself a bowl of Cream of Chicken with the homemade Chicken Broth I made earlier that day.


It occurred to me that I had never shared my Cream of Chicken recipe. This recipe here uses flour to make it creamy and thick, which is very similar to an old recipe I shared on Cream of Mushroom.


So heres my recipe for Cream of Chicken ...


Ingredients:


  • 350ml Chicken Broth, homemade or instant

  • 40g Butter

  • 30g Plain Flour

  • Salt to taste

  • Some pre-cooked Chicken Fillet, chopped or shredded (optional)


How to do it:


  1. Melt butter in a pot and at the same time add flour gradually.

  2. Mix well to form a roux (cooking till dough-like).

  3. Add chicken broth gradually while stirring.

  4. Keep stirring till roux has blend in well with the broth and that it become creamy.

  5. Bring to a gentle simmer.

  6. Add salt to taste.

  7. Serve with chopped or shredded chicken.


Read More..

Jumat, 18 Oktober 2013

Beautiful Breast of Lamb with Honey Parsley Vinegar Sauce Hey My Eyes are Up Here!

You know I love lamb, as evidenced by the various chops, shanks, legs, and shoulders Ive featured in the past. These are among the most popular meat recipes on the blog, so it seems many share my love. Here we have a brand new cut to celebrate, the lamb breast.

This is not common in your regular supermarkets. Theres an inverse relationship between the size of the parking lot, and the chances youll find breast of lamb in the meat case. However, a visit to a real butcher (look for lots of tats and facial hair) should be rewarded with some slabs of this bony, fatty, but richly flavored meat.

Since I hadnt cooked this in ages, I decided to play it safe, and use a time-tested Mediterranean-inspired spice rub, and it could not have worked more perfectly. The exotic spices made the rich meat seem even more decadent, all of which was nicely balanced by the vinegar sauces astringency.

A bright green chimichurri sauce on a well-marbled piece of meat is one of the best things ever, and this dish definitely borrows from that playbook. Its not like youd want to eat a spoon of the condiment right out of the bowl, but slathered over the glistening meat, its a thing of beauty.

I hope that if you are a fan of lamb, and you havent tried lamb breast yet, that you give it a try soon. Enjoy!


Ingredients:
2 pieces lamb breast, about 3 1/2 pounds
For the spice rub:
2 tablespoons olive oil
2 teaspoon salt
2 teaspoons cumin
1 teaspoon freshly ground black pepper
1 teaspoon dried Italian herbs seasoning (dried rosemary, thyme, basil, oregano blend)
1 teaspoon cinnamon
1 teaspoon coriander
1 teaspoon paprika
For the sauce: (note - this is all "to taste")
1/2 cup packed chopped Italian parsley
2 cloves crushed garlic
1/3 cup white wine vinegar, more as needed
1/2 teaspoon red pepper flakes
1 or 2 teaspoon honey
juice from 1 lemon
Read More..

Rabu, 16 Oktober 2013

Zespri Kiwifruit Your Daily Scoop Of Amazing

I am sure recently when you are doing your daily or weekly groceries shopping, you would notice that most supermarket are storing or having promotion on Zespri® Kiwifruit such as Zespri® Gold, Green or Organic which are available in their peak season.

So with Zespri® Kiwifruit as a great source of fibre which is essential in maintaining a healthy digestive system. I decided to take up the Zespri® 14 days Daily Scoop of Amazing Challenge which I am sure it will helps to improve my health (which I always have indigestion problem) as well as in-cooperate a balance diet and at the same time boost out our family immune system too.

Eating and bring Kiwifruit around is such a breeze with a handy kiwifruit container like this (I got this from last year Zespri® event but sometime you can get this free during Zespri® Kiwifruit promotion in the supermarkets too). As you can see from the photo above, it comes with a 2-in-1 plastic spoon and knife which enable you to cut and eat the fruit without having a mess.

As most of us know, Zespri® Kiwifruits is low in calories and fat which is a perfect snack to eat every day too. So when I post a photo on instagram and facebook page yesterday evening asking which kiwifruit I should bring along for dessert when dining out,  I received quite a number of suggestions from readers, where most of them prefer Zespri Gold (I guess they have impression that Zespri Gold is sweeter than the Green). So below I include a chart comparing both Zespri® Gold and Green for your leisure read up and better understanding of these two kiwifrutis.

Photo Credited to Zespri®


Other than serving it as snacks or desserts, Kiwifruit can also be a great breakfast choice especially for many Singaporean who are caught up in the morning rush like school kids or working adults. To eat this fruits, all you need to do is cut it into half and scoop to enjoy. Moreover kiwifruit has dose of Vitamin C, fibre and anti-oxidants which will help to promote good health and directly benefits the body.

And as usual for this year bloggers introductory pack, we also received quiet a number of interesting cute kiwifruit items such as keychains, recipes booklet, pens, lunch box, fresh kiwifruits and etc like what we get last year (HERE, if you still remember the Zespri® Goodie Bags Giveaway). So please stay tune for this years Zespri® Goodie Bags Giveaway (more details will be reveal soon) if you are interested to win some of these lovely items.

Since I have extra supplies of kiwifruits (on top of those that I bought weekly) from Zespri® I decided to share the goodness of this amazing kiwifruits with some of my besties and other family members whom I know they would definitely love them to bits.

Emmmm! Even Mums Beagle is curious about the taste of the kiwifruits


RECIPES USING ZESPRI KIWIFRUITS


Below are some of my Zespri® Kiwifruit recipes that I have shared last year using Zespri® Gold and Zespri® Green Kiwifruit which you might be interested to read more about it.


MENU
Kiwi, Lime And Mint Cooler
Avocado with Gold Kiwifruit Salsa
Pan-fry Salmon with Green Kiwifruit


DESSERT / TEA 
Kiwi And Lime Cupcakes


Lastly if you like to try other new dishes or bakes using kiwifruits, do stay tune for my upcoming post(s) on how/what I am going to create for this year using these amazing kiwifruits from Zespri®.

Read More..

Sabtu, 12 Oktober 2013

“Pad Thai” Popcorn – How Five Seconds of Late Night TV Changed the Future of Caramel Corn

Every once in a great while, I get a food wish from someone I admire and respect so much that I just can’t say no. This “Pad Thai” popcorn recipe was their latest request, and as always, I was more than thrilled to make this very influential person’s snack dream come true. Who is this mystery foodie? Me!

I was channel surfing late one night, and caught the very tail end of a show featuring a hot spot in Charleston, SC, called The Gin Joint. The theme was unique bar eats, and the host was talking about something called, “Pad Thai” popcorn. What was that?

I heard those words, and saw maybe five seconds of footage of what looked like caramel corn in a basket, and that was it. Frustrated, but quite excited, I jumped online to find the bar’s website, and hopefully the recipe. Nothing.

There were a few links with people talking about it, and a couple cell pictures, but no actual official recipe to be found. So, I decided to give myself a food wish – figure out how to recreate this extraordinary-sounding snack. I decided to simply fortify a standard caramel corn recipe with peanuts, lime, hot chilies, fish sauce, and cilantro.

Maybe it was beginner’s luck, or the collective consciousness of all the poor souls who’ve tasted that popcorn and desperately wished they could make it at home, but it came out incredibly well. Crispy, crunchy, sweet, spicy, aromatic, and awesome! You know I’m a fan of the hyperbole, but it’s with all sincerity that I say, this may be the greatest caramel popcorn-related snack breakthrough since balls.

By the way, since this was my first attempt, please feel free to adjust the ingredients amounts and report back. I think next time I’ll add a bit more lime and fish sauce, for a little extra kick. I may also explore using tamarind juice and/or palm sugar. Anyway, I hope you give this unbelievably addictive “Pad Thai” popcorn a try soon. Enjoy!


Ingredients for about 8 cups of Pad Thai Popcorn:
1/3 to 1/2 cup popping corn kernels (roughly 8 cups prepared popcorn)
1 cup finely chopped dry-roasted, salted peanuts
1/4 cup chopped cilantro
For the caramel sauce:
1/2 cup packed brown sugar
1/4 cup vegetable oil
1/4 cup corn syrup
2 or 3 tsp fresh lime juice
1 tbsp freshly grated lime zest
1 1/2 tbsp Asian fish sauce (fyi, if you dont use fish sauce, youll have to add salt)
1 rounded tablespoon Sambal red chili sauce, or very finely diced fresh hot chilies
rounded 1/4 teaspoon baking soda (not baking powder)
*bake 45 minutes at 250 degrees F., tossing 3 or 4 times during the cooking.

View the complete recipe

Read More..

Jumat, 11 Oktober 2013

The Goodness Of Homemade Yoghurt

Pin It
From a glance at the supermarket dairy section you would see many different varieties of Yoghurt from either plain to those with fruit flavour and toppings such as jam, nuts and etc. Yoghurt is so wholesome and yet easy to make without any secret in the recipe. So with a foolproof recipe anyone can start making their own yoghurt at home.

Just for a note, the bacteria used to make yogurt are known as "yogurt cultures" and from fermentation of lactose, these bacteria produces lactic acid which acts on milk protein to give yogurt its creamy texture and characteristic.


HOMEMADE YOGHURT


I used to make yoghurt years back when my boy was around 8 months old during the period when he started mashed food and puree. And I still remember his favourite choice are "Yogurt with Peach and Banana" and "Yogurt with Mashed Avocado".

A few months back after a brunch treat over at Sheries (maameemoomoo a 1/2 food blog) house where she prepared  her yummy Banana Pancakes and irresistible homemade yoghurt(stay tune for her recipe too) for us, I cant held thinking about it till I started making homemade Yoghurt again.


(Serves: 2-3 | Preparation: 15 minutes | Fermentation: 8 - 10 hours)

Ingredients:
500ml Fresh Full Cream Milk
1 Tablespoon Plain Yoghurt with Live Culture


Method:-
1. Heat the milk over low heat, stirring gently until bubbles and steam begin to appear on the surface (82°C), remove from heat.

2. Cool the milk to lukewarm or until your finger can comfortable dip in the milk for a few seconds. (preferably around 42°C)

3. Scoop about 1 tablespoon of the yoghurt cultures in a bowl, add in about 50ml of the lukewarm milk and mix well. Next pour the mixture back into the remaining milk and stir well.

4. Next pour the cultured milk into a clean sterilized glass jar or any non-reactive container and cover the lid on.

5. Lastly set the jar on the counter top in your kitchen and wait for the culture to convert the natural sugar in milk to lactic acid before it turns into yoghurt. The whole process takes about 8 - 10 hours depends on the weather. (I usually make the yoghurt at night and let is set at the counter top overnight and it would be ready in the morning around 7am)


6. Put the jar in the refrigerator immediately to slow down fermentation and as well as firm the texture of the yoghurt. It will last for about 1 - 2 weeks in the fridge.

Note:-

These are some of the plain yoghurts that are available in major supermarkets.


There are so many ways you can enjoy the wholesome goodness of homemade yoghurt such as eating it plain on its own or drizzle with of Honey or Gula Melaka Syrup to sweeten its taste. If you want something more cafe style or with bits of crunch, you could also add in cut fruits or Muesli like what I did from the photos shown above.

Important Note(s):-
~ Do not add in the live yoghurt cultures if the warm milk is above 42°C or else the heat will killed the live cultures and effect the texture and overall result of the homemade yoghurt.

~ Different brands of plain yoghurt might produce different results so you have to take note and check the labels to ensure they contain yoghurt making bacteria such as Lactobacillus aci-dophilus, Streptococcus thermophilus.


BLUEBERRY COMPOTE
(Preview)


To make something more impressive for your guests, you could served it with some quick fruit compote on the homemade yoghurt. Here is a quick recipe on 5 minutes Blueberry Compote.

Read More..

Rabu, 02 Oktober 2013

In Defense of Rounded Wooden Spoons and Being Wrong in the Kitchen

There are few food folks I enjoy and respect more than Michael Ruhlman. He’s a celebrated, award-winning author; an influential and generous member of the food blogging community; and my favorite Iron Chef judge (best perplexed look in the biz). 

However, in this amusing “Had Something to Say” video, produced by friends Diane and Todd from White on Rice, Mr. Ruhlman reminded me why, when it comes to cooking at least, being right isn’t as important as being happy.

Everything Michael says about the rounded wooden spoon’s design in this “Stupid Kitchen Tools” video is correct. A squared-off, flat-edged wooden spoon is the superior stirring implement, but that doesn’t change the fact that my mother used a rounded wooden spoon, which was the same one that my grandmother used, which was exactly like the one that my great grandmother used.

So for me, it looks right, feels good in my hand, and contrary to what Mr. Ruhlman believes, serves as the perfect tasting instrument – lovingly associated with all kinds of delicious memories. I’m sorry, but tasting spaghetti sauce off a square wooden spoon is like a chef using oven mitts instead of kitchen towels; it works, but it’s just not a great look.

Squares and right angles are the work of man. It’s the shape of industry, not art. Nature is round, food is round, and people are, well, you know. Cooking equipment, like life itself, is much more about what you want, than about what you need. Our brains may grab for the square wooden spoon, but the soul of a cook reaches out for the rounded one every time. What say you?

Sincere thanks to Michael Ruhlman, and to Todd & Diane for sharing this great video with us! You can follow this link to get more information and read their original post. Enjoy!

Read More..

Sabtu, 14 September 2013

Cream of Mushroom with Roasted Garlic 蒜蓉奶油蘑菇浓汤


This soup was inspired by Campells canned soup of the same name. :P


If you like that soup, youll be surprised how easy it is to make it at home and I dare say, tastier. ;P


Basically, it a combo of Cream of Mushroom and Roasted Garlic but I have tweak my Cream of Mushrooma little here.


Ingredients:


  • 200g Brown/White Button Mushroom, chopped

  • 100g Shitake Mushroom, sliced

  • 15g Butter

  • 300ml Chicken Broth

  • 250ml Whipping Cream

  • Salt to taste

  • 1 to 2 tablespoon Roasted Garlic


    How to do it:


    1. Saute sliced shitake mushroom with 1/2 the butter till absorb the butter.

    2. Dish and set aside.

    3. Using the same pan, saute the chopped button mushroom with the remaining butter till it sweat.

    4. Pour mushroom into the blender.

    5. Add the broth.

    6. Blend till desired consistency.

    7. Pour into a pot.

    8. Add in the previously cooked shitake mushroom and roasted garlic.

    9. Bring to a simmer.

    10. Stir in the whipping cream.

    11. Simmer till garlic has soften.

    12. Serve.


    Note:


    • You can use either white or brown or both button mushroom.

    • Do consider adding Portobello Mushroom too. It makes the soups flavour richer. Its slightly more expensive though.


      Read More..

      4th of July Special Cherry Bomb Chicken – Because There Are No Grape Bombs

      I was playing around with a new brine idea for grilled chicken, and decided that since I was using cherry tomatoes and explosive habanero peppers, Id do a little 4th of July firecracker-themed word play and call this "Cherry Bomb Chicken."

      Unfortunately, the sweetest, ripest cherry tomatoes at the market that day were grape tomatoes, which makes the name somewhat dubious. Never one to worry about letting facts get in the way of a good story, I decided to double down.

      Now Im claiming that not only does "cherry" refer to the tomatoes, it also refers to the old phase, "thats cherry," which is how us old folks used to say something was, "the bomb." As far as a technique for ensuring your holiday chicken is ultra-moist and flavorful, this is both "cherry" and "the bomb."

      I had a quail dish once in which the birds where marinated in a tomato-water brine, before being grilled. I remembered it was really good, and thats what inspired this relatively odd treatment. Thanks to the magic of brining, this really will almost guarantee a juicy, tasty piece of chicken – and the method allows for countless customizations.

      By the way, dont be tempted to leave it in the brine longer; 4-6 hours is ideal. You want the meat brined, not cured. This will also work for pork chops if thats more your thing. I hope you give this a try soon, and that you all have a fantastic 4th of July weekend! Enjoy!


      Ingredients:
      Brine:
      1 quart cold water
      1/3 cup kosher salt
      1/2 cup sugar
      1 pint cherry tomatoes
      3 habanero peppers
      1/2 teaspoon allspice
      4 cloves garlic
      Oil Rub:
      1/2 tsp dried thyme
      1/4 tsp cumin
      1/4 tsp black pepper
      1/4 tsp cayenne
      1 tbsp vegetable oil

      1 4 lb. quartered chicken plus wings
      2 tbsp red pepper jelly (or sub bbq sauce, or teriyaki sauce)

      View the complete recipe

      Read More..

      Kamis, 12 September 2013

      Grilled Kiwi Chili Rubbed Beef Short Ribs – Labor Day Cooking Shouldn’t Be a Lot of Work

      Labor Day weekend is always a bittersweet holiday. It’s supposed to honor America’s organized labor movement, but really what it mostly celebrates is the end of summer. 

      Pretty soon our grills will be covered by huge snow drifts, and the season’s warm breezes will be a distant memory. Well, not for me, as I live in California, but you get the point.

      This grilled kiwi and chili-rubbed beef short ribs recipe is specifically designed with that melancholy in mind. The prep is minimal, and the ultra short cooking time means that instead of being stuck in front of a grill, you can actually enjoy more of these last precious summer days.

      We tied the world record here for fewest ingredients in a marinade, with one, but thanks to the kiwi’s enzymatic magic, that’s all we need. Unlike some tropical fruit marinades, kiwi doesn’t turn the meat into mush, and provides a nice, slightly sweet and acidic base for our Ancho chili rub. I loved how this came out, and while highly-seasoned, the beefy goodness of the short ribs really came through.

      I want to wish all of you a happy and healthy Labor Day weekend. What better way to celebrate organized labor, than by doing the minimum amount of it at your cookout? I hope you give these super simple, but very delicious kiwi and chili-rubbed short ribs a try soon. Enjoy!


      Ingredients for 4 portions:
      2 pounds Korean-style (aka flanken style) beef short ribs
      1 kiwi
      For the chili rub:
      1 tbsp ancho chili powder
      1 tbsp sugar
      1 tbsp kosher salt
      2 tsp freshly ground black pepper
      1 tsp garlic powder
      1/4 tsp cayenne, or to taste
      Read More..

      Selasa, 10 September 2013

      Affogato and the Magic of Cold Brewed Coffee

      Michele and I are still in steamy Chicago, where the temperature is about 95, but the humidity makes it feel more like the sun. Man, could I go for an iced coffee right about now. I’ve been interested in trying this cold-brewed coffee technique for a while, but it was this lovely post on An Edible Mosaic that moved me into action.

      Of course, the glamor shot (formally referred to as the “money shot”) is of an Affogato – the ultra-simple, Italian coffee dessert – but the real star here is the amazingly easy iced coffee concentrate recipe.

      Apparently, since the flavors are extracted without heat, the results are a smoother, less acidic, less bitter product, which supposedly offers a purer coffee experience. All I know is that it made the best tasting iced coffee I’ve ever had. This would’ve been a complete success just for that fact alone, but that it also made possible this incredibly refreshing affogato, puts it way over the top.

      You can use the coffee concentrate straight on ice cream or gelato, or dilute it with an equal part water for iced coffee. Of course, the purists will tell you that affogato is made with hot espresso, but the cold coffee works really well. The ice cream melted more slowly, and seemed to be even creamier than the standard technique.

      Anyway, this only takes about five minutes to make, there are no special tools or equipment needed, and one taste is all you’ll need to become a believer like me. I hope you give this a try soon…while it’s still hot. Enjoy!


      Cold-Brewed Coffee Concentrate (makes about 2 3/4 cups)
      3 cups cold water
      2/3 cup very freshly ground coffee (I used the medium grind on my espresso machine)
      *Mix water and coffee in a large glass container. Cover and let it sit at room temperature for 12 hours. Strain though coffee filter or paper towel, and serve!

      For the Affogato:
      1 or 2 scoops vanilla ice cream or gelato
      as much coffee concentrate as you like (I like equal parts)
      shaved dark chocolate
      Read More..

      Sabtu, 07 September 2013

      Boil n Bake Baby Back Ribs – Crime Against Nature Or Just Guilty of Being Delicious

      Here’s what I know: I took some baby back ribs, simmered them for an hour in a flavorful liquid, glazed them in sauce, roasted them in the oven for about half an hour, and they looked and tasted really good. I also know these boil-n-bake baby back ribs would be great at any party, preferably a Super Bowl party (during which the Giants win the game).

      Here’s what I don’t know: Why so many people will lose their minds over the fact that I boiled these ribs. They’ll say it’s a crime against nature, and that these are just not the same as baby backs slowly roasted over smoky coals for hours and hours. Well, duh.

      These aren’t meant to replace, or even compete with, a traditionally barbecued version. This is simply a fast and tasty alternative method for having a nice stack of ribs appear on your snack table. Seriously, what’s the problem?

      This is one of those recipes where I don’t want or expect you to use the same stuff I did. This is more about the quick and dirty method than any specific ingredients. I would make sure the simmering liquid is very well salted, and have a decent amount of acid and spice, but other than that, anything goes.

      As far as the glaze, I just threw a bunch of stuff in a mixing bowl, in a sort of stream of saucy consciousness, but very much enjoyed the results. Chinese 5-spice is wonderful with pork, and created a beautifully aromatic base for the sweet, sour, and spicy sauce.

      By the way, if it looks like I was a little short on sauce, I was, but made a little more while they were roasting, and it was fine. The amounts below will give you plenty for a rack of baby back ribs. I hope you give this a try soon. Enjoy!


      Ingredients:
      1 slab baby back ribs
      2 1/2 quarts cold water
      1/2 cup rice vinegar
      6 cloves crushed garlic
      1/2 onion, chopped
      2 tbsp kosher salt (less if using fine salt)
      1 tbsp Chinese 5-spice
      1 tsp red chili flakes
      2 bay leaves

      For the glaze:
      1 1/2 tbsp soy sauce
      1 1/2 tbsp rice vinegar
      1 1/2 tbsp ketchup
      1 1/2 tbsp Dijon mustard
      1 1/2 tbsp honey
      1 1/2 tbsp brown sugar
      2 tsp sambal chili paste, or to taste
      1/2 tsp Chinese 5-spice
      Read More..

      Senin, 12 Agustus 2013

      Poulet aux quarante gousses d’áil or chicken with 40 cloves of garlic


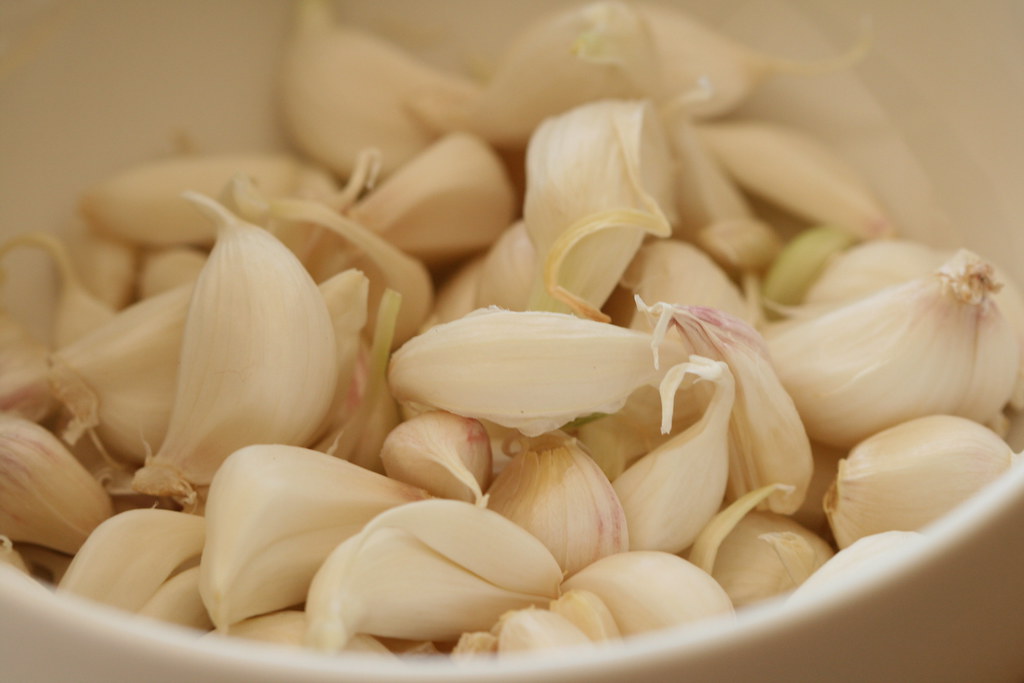
      Heres a dish that I made several times during last year - and hope to make again as soon as the fresh, new seasons garlic appears on the market stalls in a couple of months. Its a dish that I had been intrigued by for ages - imagine, 40 whole garlic cloves to season just one chicken! - and when I finally made it, I fell instantly in love with it. When researching the dish, I came across several and very different versions. After making it several times, Ive settled for this minimalist one. Just chicken, olive oil, lots of garlic and some saltnpepper. If you like your chicken with crispy skin and sticky, browned bits, then this version isnt perhaps for you, though you can always brown the chicken on a frying pan first and give it a short blast under the grill at the end.

      The dish originates in Southern France, Provence, which is famed for its excellent olive oil and large, rosy-tinged garlic cloves. I love making this with young fresh garlic (see photo here), but it works with any garlic. Although the amount of garlic sounds somewhat over the top, then trust me and dont be tempted to choose some tiny garlic cloves. The bigger, the better here. Also, Im sure the French would use a good extra virgin olive oil here, but if price is the issue, then any good olive oil works here.

      Chicken with 40 cloves of garlic
      (Kana 40 küüslauguküünega)
      Serves 6

      Poulet aux quarante gousses dail / Chicken with 40 cloves of garlic / Kana 40 küüslauguküünega

      1 whole chicken, preferably free-range (about 1,5 kg)
      salt and freshly ground black pepper
      40 large garlic cloves (from 4-5 whole heads of garlic)
      250 ml (1 cup) olive oil
      fresh herbs of your choice (rosemary, sage, thyme, bay leaves)

      First, prep your garlic cloves. When making this with fresh and young garlic cloves, then theres no need to peel them. During winter you should first blanch your garlic cloves in boiling water for 1 minute, then drain and remove the softened papery skins.
      Using a kitchen paper, pat the chicken dry. Season generously with salt and pepper, both inside and out. Place the chicken, breast-side up, into a Dutch oven or heavy casserole dish where the chicken fits snugly (the better the fit, the less oil you need).
      Push the garlic cloves and herbs around the chicken, pressing them down between the chicken and the dish.
      Pour over the olive oil - check that all the garlic cloves are covered with oil.
      Cover the saucepan and place into a preheated 180 C/360 F oven. Bake for 1 hour and 15-30 minutes, until the chicken is cooked.

      Poulet aux quarante gousses dail / Chicken with 40 cloves of garlic / Kana 40 küüslauguküünega

      To serve, carve the chicken into suitably large chunks. Serve with fresh green salad leaves and some wholemeal bread to mop up the delicious garlicky juices. Dont forget the softened and mellowed garlic cloves - these are the extra bonus of the dish. I love pressing them onto piece of bread.

      * You can use the leftover garlicky olive oil to dress up a salad or serve as a seasoned frying oil during the next few days.
      Read More..